Land Based Rescues
These rescues are the safest and can even be done by non-swimmers if you practise in only chest deep water. Make sure you look after your own safety first. Secure yourself to something solid.
Shout and Signal
Clear communication is essential for a safe rescue.
Shout! The casualty may not always face your way.
Let the casualties know you've spotted them.
Give instructions to them so they can help themselves, if possible.
Tell them to kick their legs and push towards you.
It may just work.
Reaching Rescue
Most drownings happen within 3 to 15 meters from a point of safety. For nearby casualties the reaching rescue is an easy way to help.
Lie down and use an aid to reach the casualty. Use a stick, rope, air mattress, or an item of clothing and carefully present it to the casualty to hold on to. Then pull them to the edge and make sure they get out safely.
The most important consideration for a reaching rescue is that you lie down or have a very good hold of something firm, not other people. If you don't observe this simple rule you may be pulled in by the casualty.
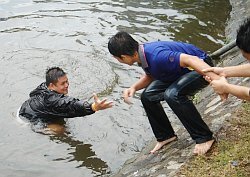
Don't stand up or you get pulled in.
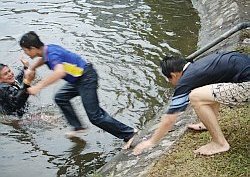
Yes, we told you so.
Rope Throwing Rescue
If the casualty is beyond your immediate reach, throw a rope and pull them in. A floating aid with a line attached is best because the float provides support and the line lets you pull the casualty to safety.
Throwing rescues can be used for any type of active casualty but not for unconscious casualties. For river float trips a throw line is the main rescue aid.
The farther casualties are from shore, the more important it becomes to keep track of their location, particularly if the water is not clear.
If any casualties submerge before you can help, then you will need to know where they went down, and that is hard unless you watch them closely.
Rope Throwing Practice
Split your class into pairs. One enters the pool and moves about 10 meters away from the edge. From land, the rescuer coils up a rope and throws it to the casualty. See who gets the casualty back to poolside fastest.
In this and all other rescues, keep your eye on the subject as much as possible while you look for equipment and get in position. The task is easier if you work with someone else in the rescue. One person can act as spotter while the other gathers equipment.
A good time for throwing the rope and pulling in a casualty over 10 meters distance would be about 30 seconds. The skill is in coiling up the rope quickly without getting it into a tangle. Then throw it at a 45° upward angle towards the casualty.
Throw a Buoyant Aid
From land, throw a buoyant aid with line to hit a floating target. See who gets the most hits in a minute.
Around the water you may find life jackets, ring buoys, inner tubes, air mattresses, kick boards, and flotation cushions, that can serve as good throwing devices that float.
You also can try beach balls or volleyballs, but they may be difficult for the casualty to grasp. It doesn't need not have a line attached.
Anything can be used that will float well enough to support the casualty, something the casualty can hang onto, and is small enough for you to throw or shove the casualty from shore.
Aim carefully before you toss the device. The float should land within reach without hitting the casualty's head. Be sure to allow for wind and current. Generally the device should hit the water upstream of the casualty.
If the casualty can support himself with a loose float, he probably will be able to paddle himself to shore. Shout encouragement and have him travel with the current rather than against it.